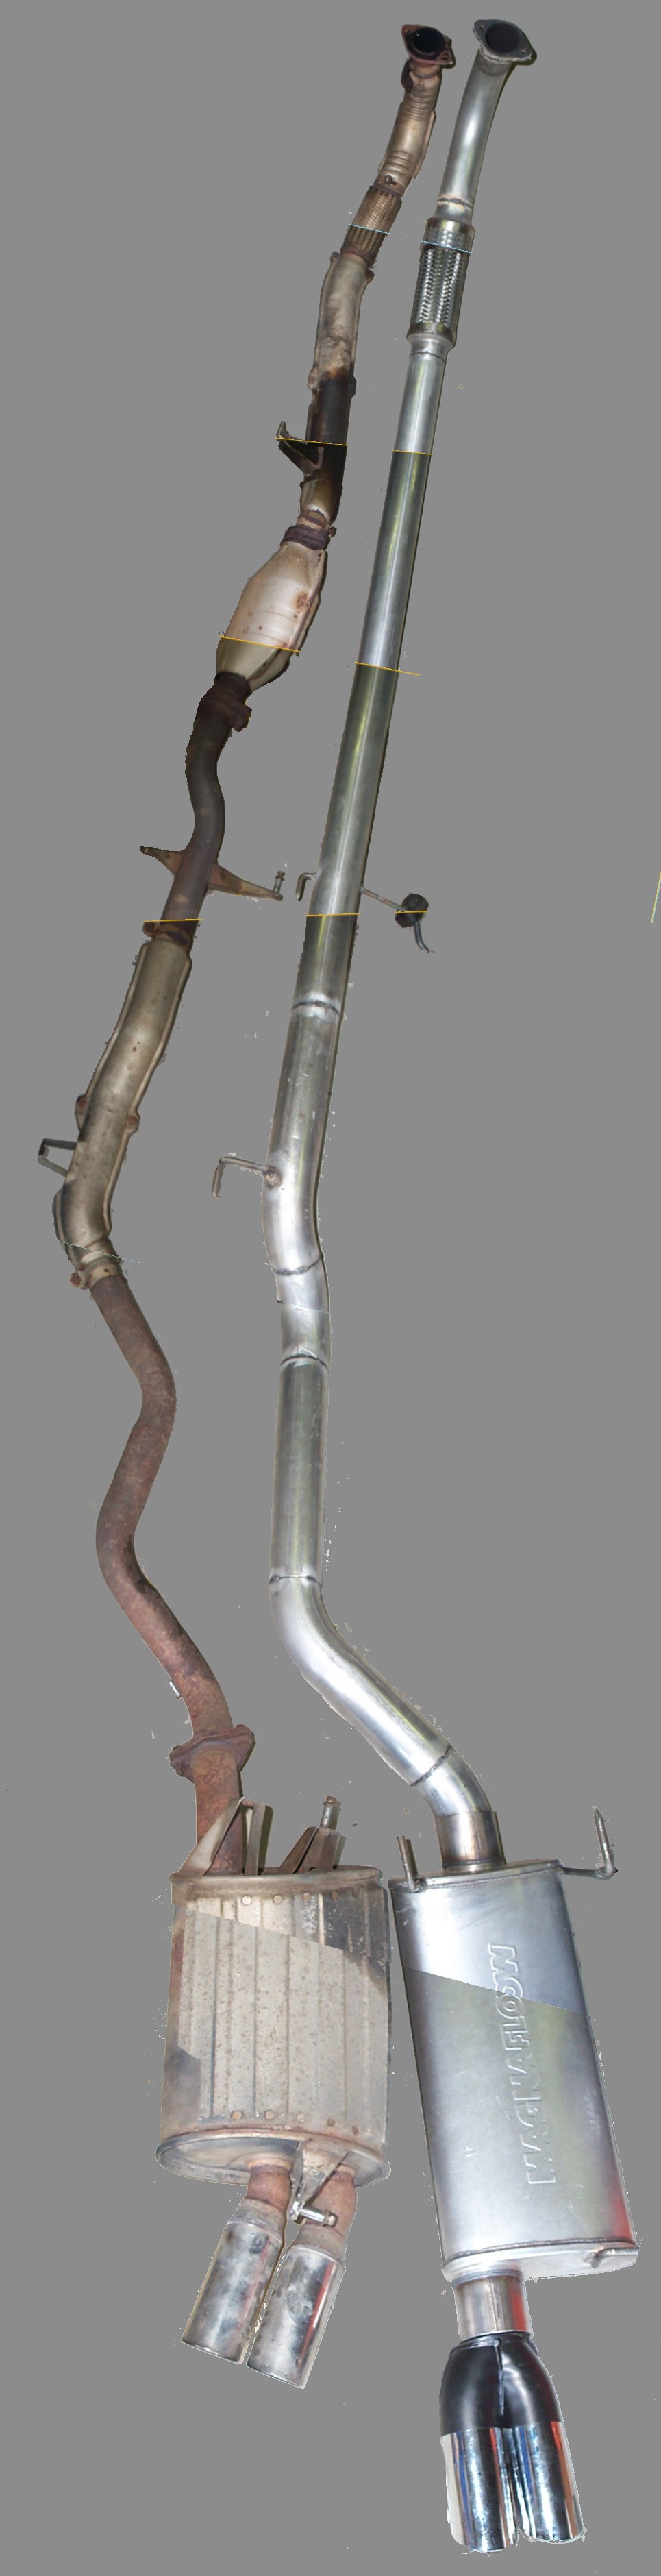
So you want to build a 3" exhaust for your DSM? This is the place to be.
I'm going to go through step by step what we did to build this exhaust.
This system was built for aproximatly $225.00 - $360.00 depending on if you want a Cat and Tips (mine came to about $265).
While building this system, remember that there are more pictures on the previous page to guide you.
Listed below are the tools/parts we used. You may be able to get away with using less tools/parts but I am listing how we accomplished this.
More Pictures Here.
Tools:
Wire feed welder
Small handheld grinder
Flathead screwdriver for marking
Cut-off saw
Sawz-all
Vice
|
Parts:
One 180 degree 3" Mandrel bend (jcwhitney.com - 81ZX3036T - $27.49)
One 90 degree 3" Mandrel bend (jcwhitney.com - 81ZX2954Y - $19.29)
Aprox. 6ft of 3" straight pipe. (I bought 7ft from a local muffler shop for $25)
One Stock Sized DP Flange (roadraceengineering.com - $10)
Maganaflow 3" straight through muffler (roadraceengineering.com - 12259 - $80)
One 3" (or 79mm) exhaust clamp ($2 at AutoZone)
3" Braid Covered Flex Section (roadraceengineering.com - $60)
A number of 10" nails (34 cents at Home Depot)
Twin exhaust Tip (roadraceengineering.com - $40) [Optional, I did this]
Three inch high flow cat (roadraceengineering.com - 93009 - $99) [Optional, I didn't do this]
|
|
|
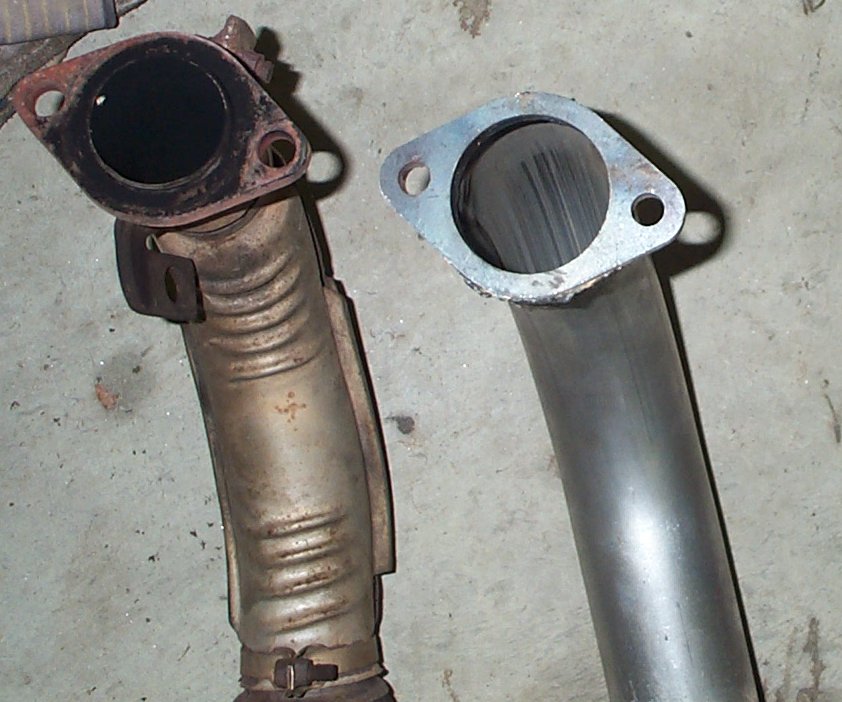
1) Downpipe
Building the downpipe is the easiest part. There are a few tricks we learned along the way that will make things even easier for you.
Below are pictures of the downpipe. Examine these pictures closely, then read the text below.
Click on an Image to display a larger version
1) We trimmed about 2" off the end of the 90 degree bend where the flange would connect to the pipe.
The reason behind this was to raise the pipe up close to the underside of the car.
2) Notice how the flange is twisted around the pipe entrance just slightly?
The easiest way to accomplish this is to put the flange on the bolts coming down from the turbo, then hold the 90 degree bend in place, with the exit of the bend pointing straight back.
Now use the screwdriver to scratch a line across the flange and pipe, so you have an alignment mark.
Do not try to bolt the flange in place and then hold the pipe up there. It will not fit (see #3).
3) Now, while the 3" pipe will fit on the flange, it will not fit with the nuts around the turbo exit bolts.
There is a very easy way around this. First, tack weld the pipe to the flange at the front and back of the flange (opposite the bolt holes).
Next, place the pipe in the vice, and squeze the sides that are not tack welded.
This will cause the pipe to bulge at the "corners" without overlaping the flange. Squeeze until there is enough room to place a nut/socket over the hole and turn with the pipe in place.
Since the hole in the flange (and from a ported stock turbo) is only 2.5", you might as well squash as far as you can without overlapping.
Remember, this retains the same volume of air throughout the pipe (3").
Now you can testfit, then do the full weld.
4) The final downpipe step is easy. Weld the flex pipe to the other end of the 90, then weld a big peice of straight pipe to the end of that.
The correct length should cause the downpipe to end at the same spot as the rear heat sheild starts on the stock exhaust.
For the hangers, we used the handheld grinder to round off the points of 10" nailes, and cut them to length. After the nails were Welded into place, the rubber boots would slide easily over them easily.
If you would like a cat on your system, splice it in somewhere on the straight pipe. Do not put it directly off the flex pipe, it will be too close to the transfer case to clear.
However, don't go too far back, or the cat won't get hot enough to be effective.
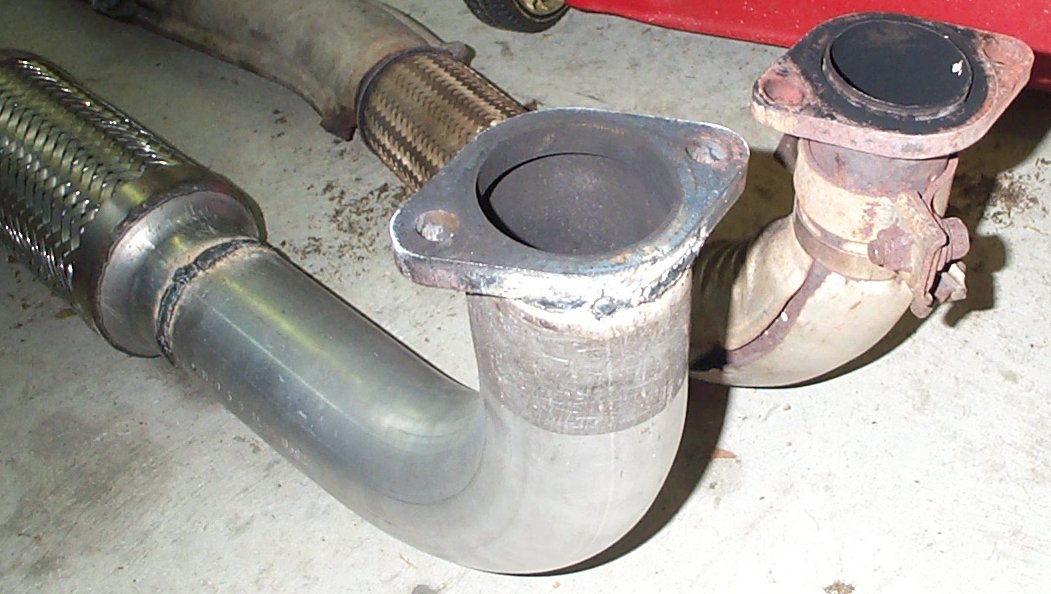
2) Rear Section
This part is a little more tricky as you have to start cutting and twisting the bends, however it's still not too difficult, just more time consuming. A lot of tack welding and testing will take place while assembling the rear peice. Examine the picture below before reading on.
Click on an Image to display a larger version
1) Using the cutoff saw, cut the 180 right down the middle, leaving two 90's.
Next, cut 45 degrees off of each of the 90's.
This will leave you with 2 small 45 degree peices, and 2 45 degree peices with the straight ends of the 180 on them.
2) Now, you'll want to do tack welding and test fitting, etc, but this is the gyst of what will be done with the bends.
Weld one short 45 onto the bent edge of one of the long 45, creating a straight pipe with an "S" bend on the end (see above picture).
Weld the other short 45 to the straight end of the other long 45, creating an S with a straight section in the middle (semi-symetric).
Next, take the S that has a straight part on one side, and the S on the other, and line up the straight end with the end of the downpipe under the car.
Twist the S, so that it starts to travel under the driveshaft.
Mark with a screwdriver, pull off whole exhaust, tack weld, test fit, weld, etc.
Hangers are made the same way as before.
3) Tack weld aprox. 2 feet of straight pipe onto the end of the exhaust. Test fit.
It will be the perfect length when the straight pipe ends right before axle, right near the corner of the rear diff.
There is a slight notch the pipe is going to travel through, between the wheel supports and the center diff.
You will see it when you are under there.
Now, the muffler will need to be farther out if you want to leave it bare, or closer in if you want to leave a tip.
This section of straight pipe will be what determines this. A little longer if you don't want tips.
4) Now you will use the same method to attach the next S bend.
This one is a little more tricky because you have to align it to the muffler as well.
Holding one end of the S bend (the semi-symetric one of course) against what you have completed so far.
Get a friend to hold the muffler in place, make SURE the side of the muffler with the pipe in the middle (not the side) is facing under the car, the outlet will be on the side of the muffler, moving it a bit closer to the center of the car.
Now just line the pipe up where it just barely slips into the muffler (the muffler hole is just over 3"), and mark it, take off, weld, etc.
5) The final step for this section is to weld about an inch of straight pipe onto the end of the bend.
This will give the muffler more to grip onto, as the muffler entrance will slide over the 3" pipe so you can clamp it down.
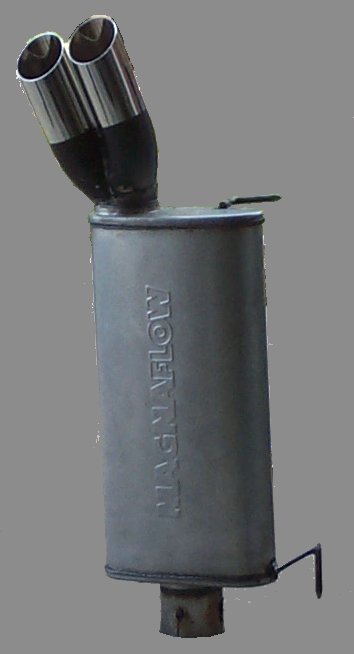
3) Muffler
At this point you should feel releived, you're almost done, and you don't have to take the whole exhaust off the car anymore. Again, look at the picture first.
Click on an Image to display a larger version
1) Hangers. Hangers are the key here. They will determine the angle of the muffler.
When complete, our muffler came out pointing slightly up and out, so we had to angle the tips back in and down.
If you're not using tips, just make it as acurate as possible.
2) To clamp the muffler down, we used a sawz-all to cut four 1 inch slits in the the muffler entrance.
We then slid the muffler over the pipe, and used the 3" clamp to mount it.
If you're not using tips, you are now finished!
3) If you are using tips, and your muffler is angled slightly like ours, you'll need to do some more cutting.
First, cut the outlet of the muffler at the angle you will need to make the tips exit straight.
Next, cut off the straight part on the tips just behind the weld, this will eliminate some length, and some restriction (look inside the tips, you'll see what I'm talking about).
Take the muffler exit and stick it in the vice. You're going to need to squash it into an oval to match the new entrance to the tips.
Clean the black paint off the tips and tack, test, twist, weld, etc.
You're finished!
Now that you are done, and enjoying your deep rumbling (but not anoyingly loud) exhaust, feel free to shoot me an email saying you found these intructions useful, so all my typing didn't go to waste :)
Contact info@coronium.com for more information.
|
|
|